Though this was completed in the summer, this is an update on the planning and build of my shed.
The idea behind this build was to clear space in my garage so I can convert it to a full on woodshop. When a lawnmower, weed-eater, shovels, plows, wheelbarrow and many other yard tools take up a ton of space, it’s hard to do any wood working projects. I needed to get everything out of my woodshop so I can do…you know… actual woodworking.
Having never built a shed, I consulted my best knowledge resources – the internet. A lot of experts are on the platform for many phases of the project. Below is what I consulted as reference for most of the build.
Plans: https://www.construct101.com/
Shed Foundation: https://youtu.be/XodcMhvfkXg?si=75wKyOO2G3GjizjA
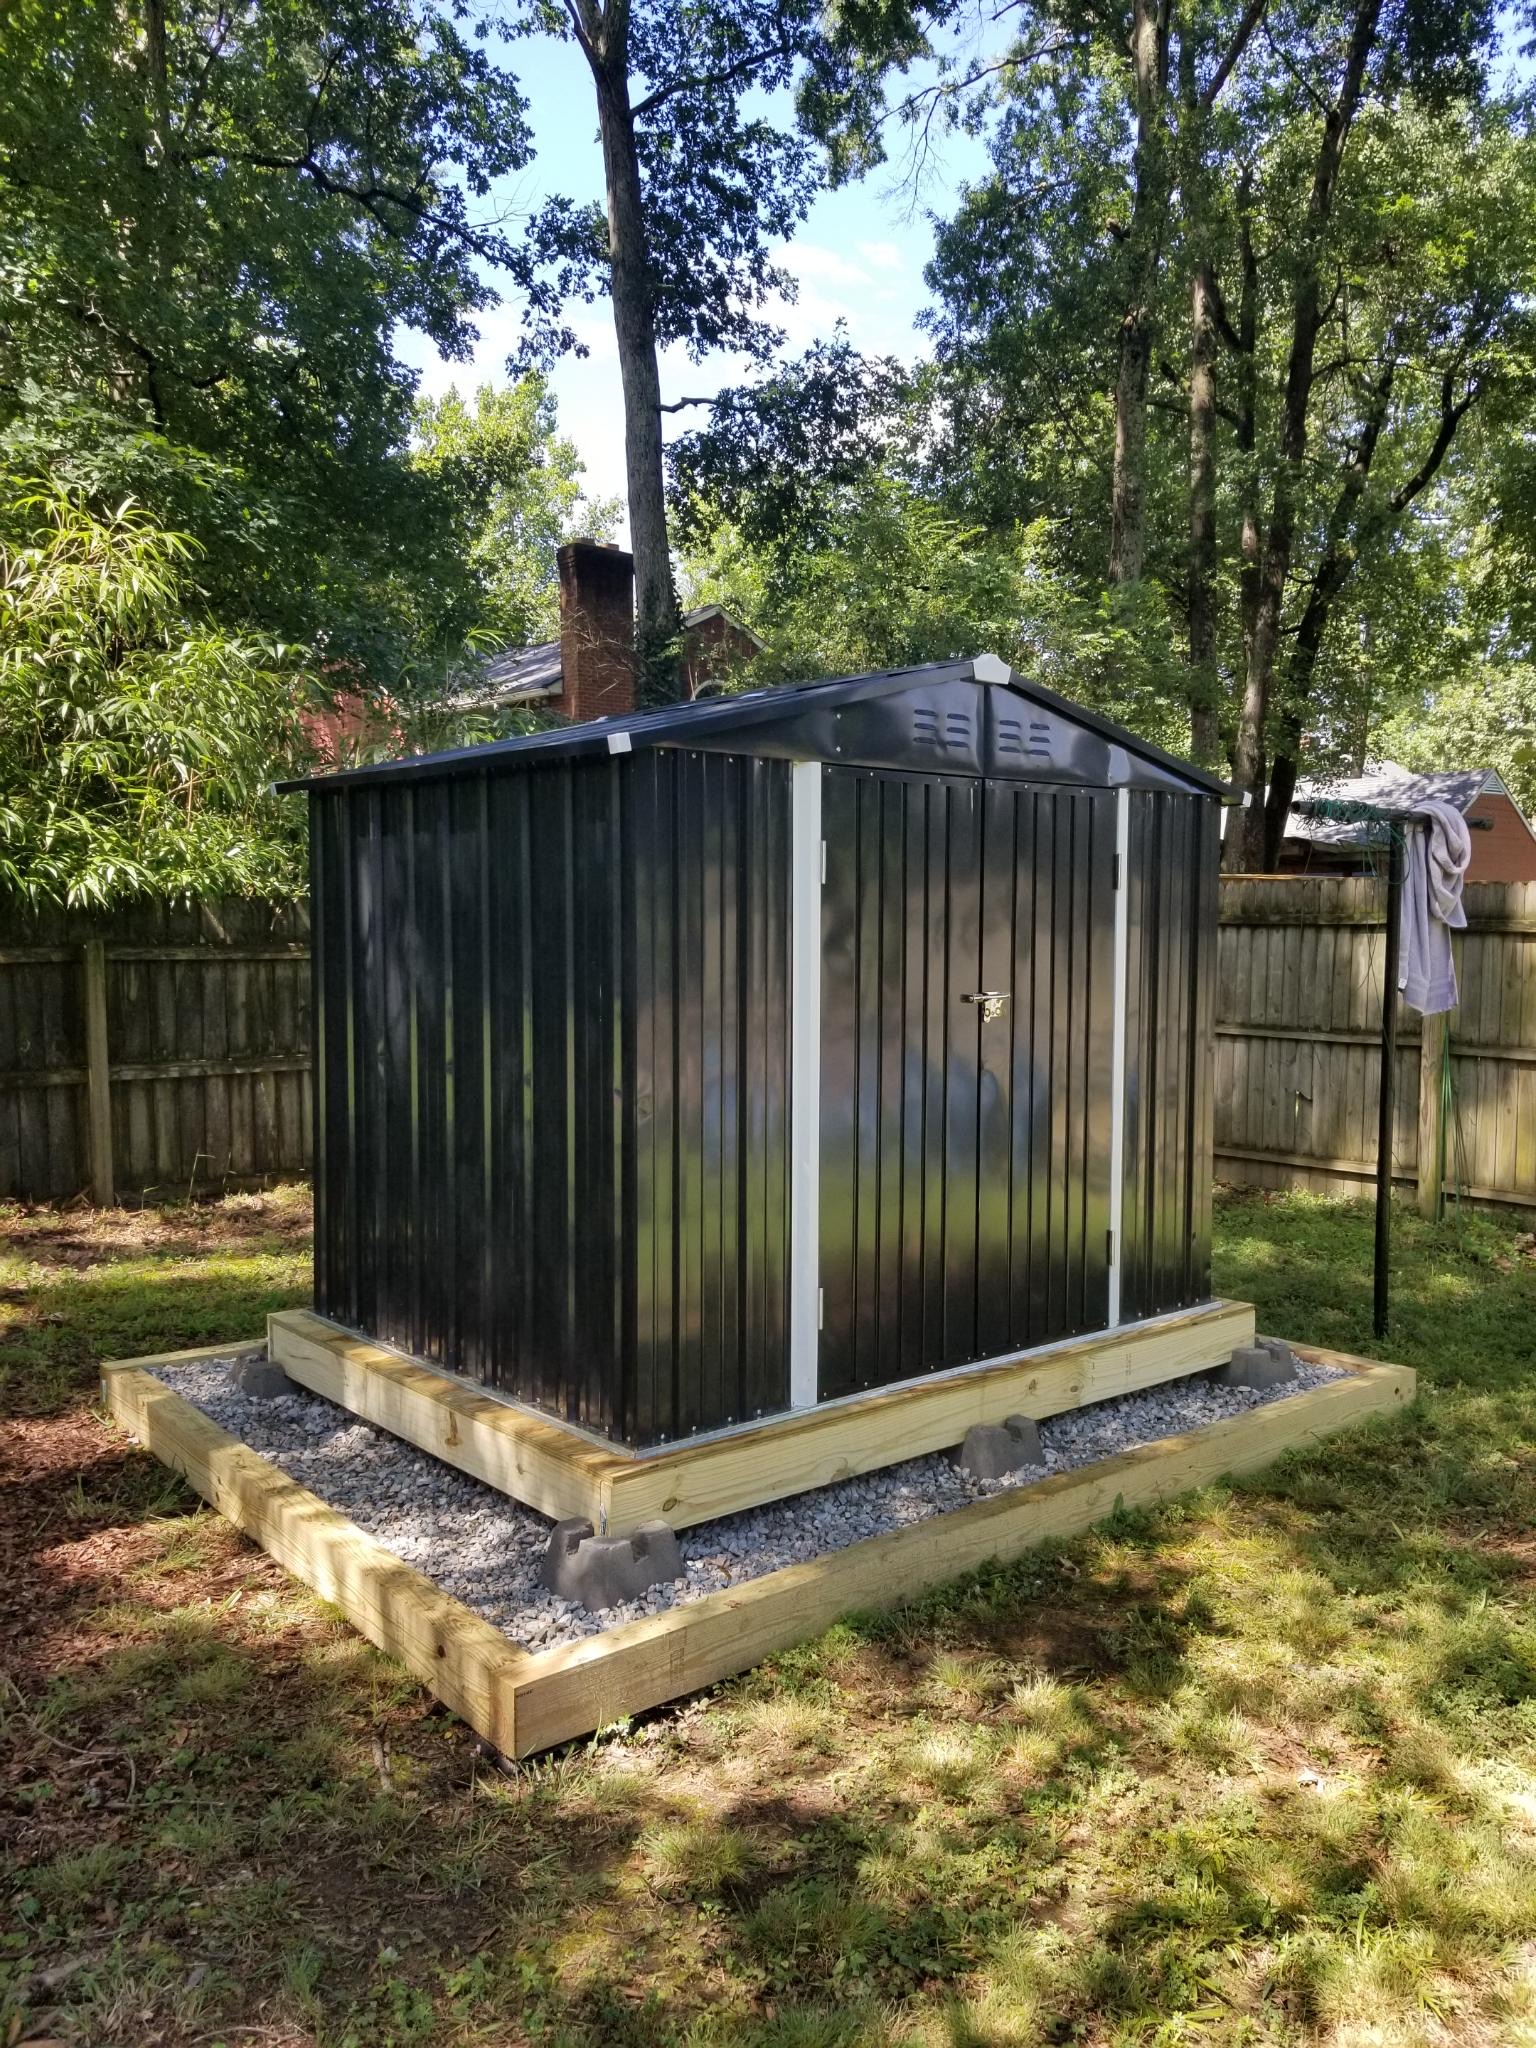
Because of the time, I decided just to buy a pre-fab metal 6×8 shed instead of build one myself. But the landscaping, base and foundation build was completed using online resources as a template and guide.
Step 1: Build the Foundation
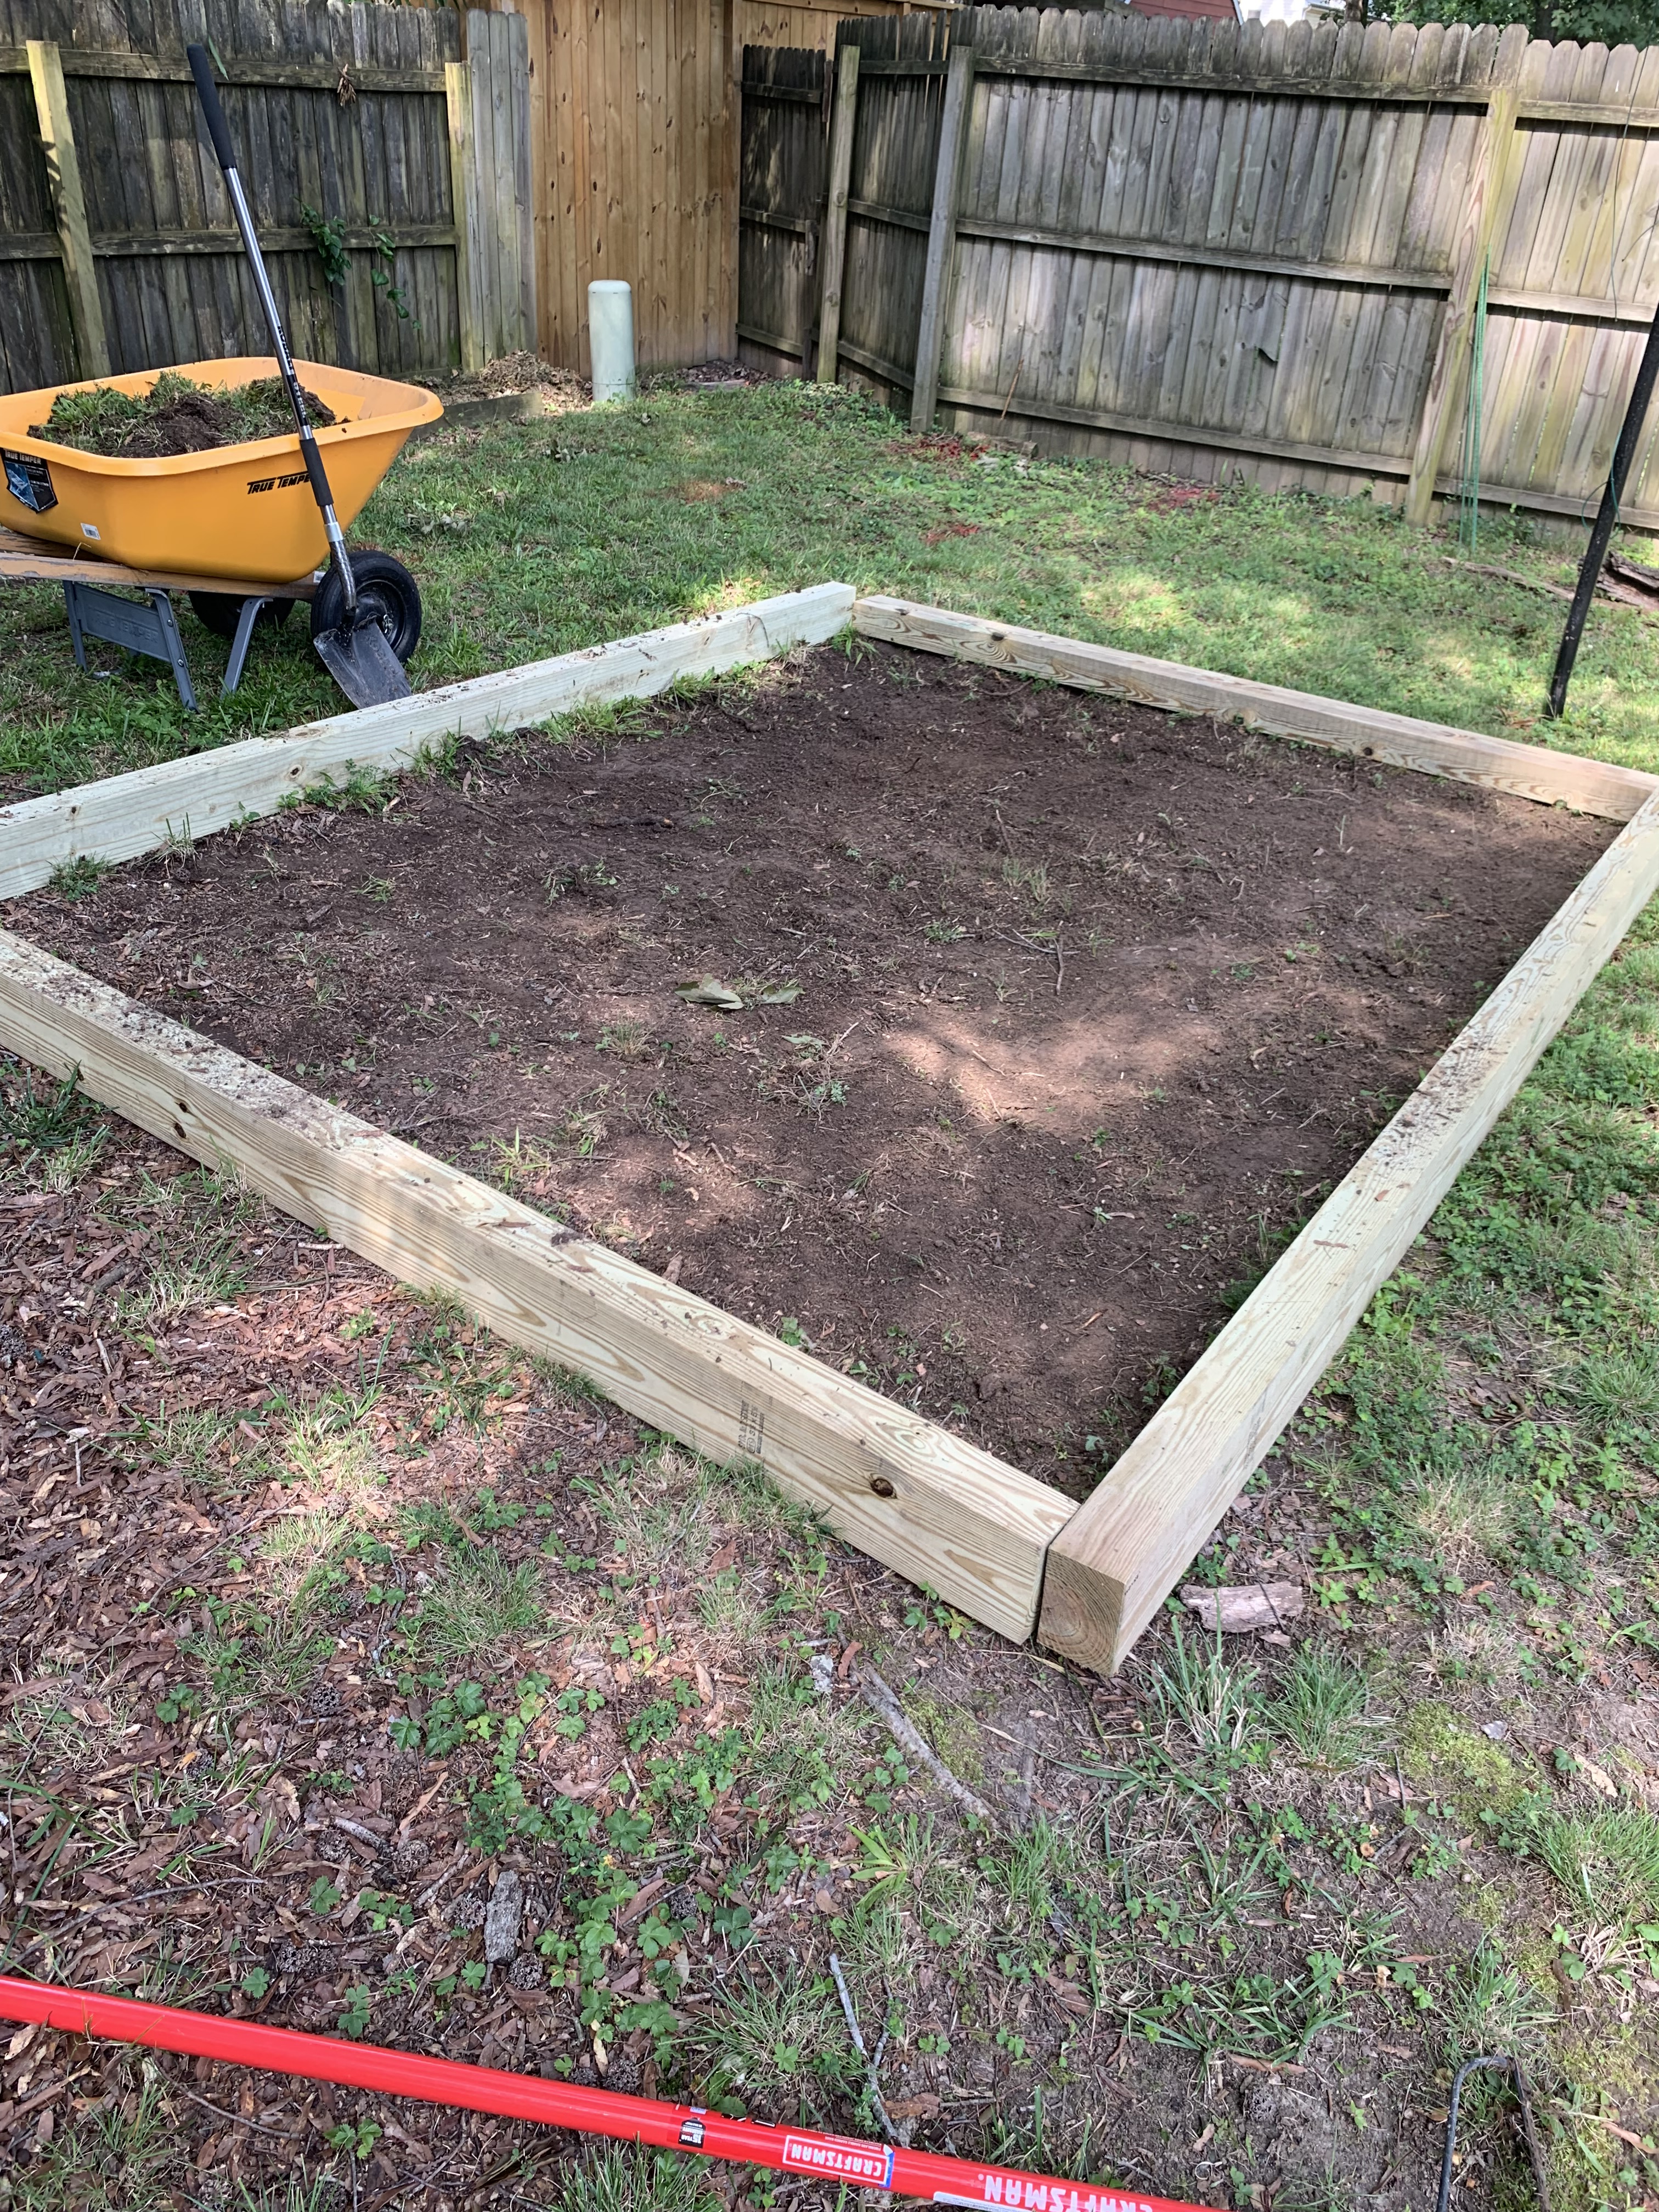
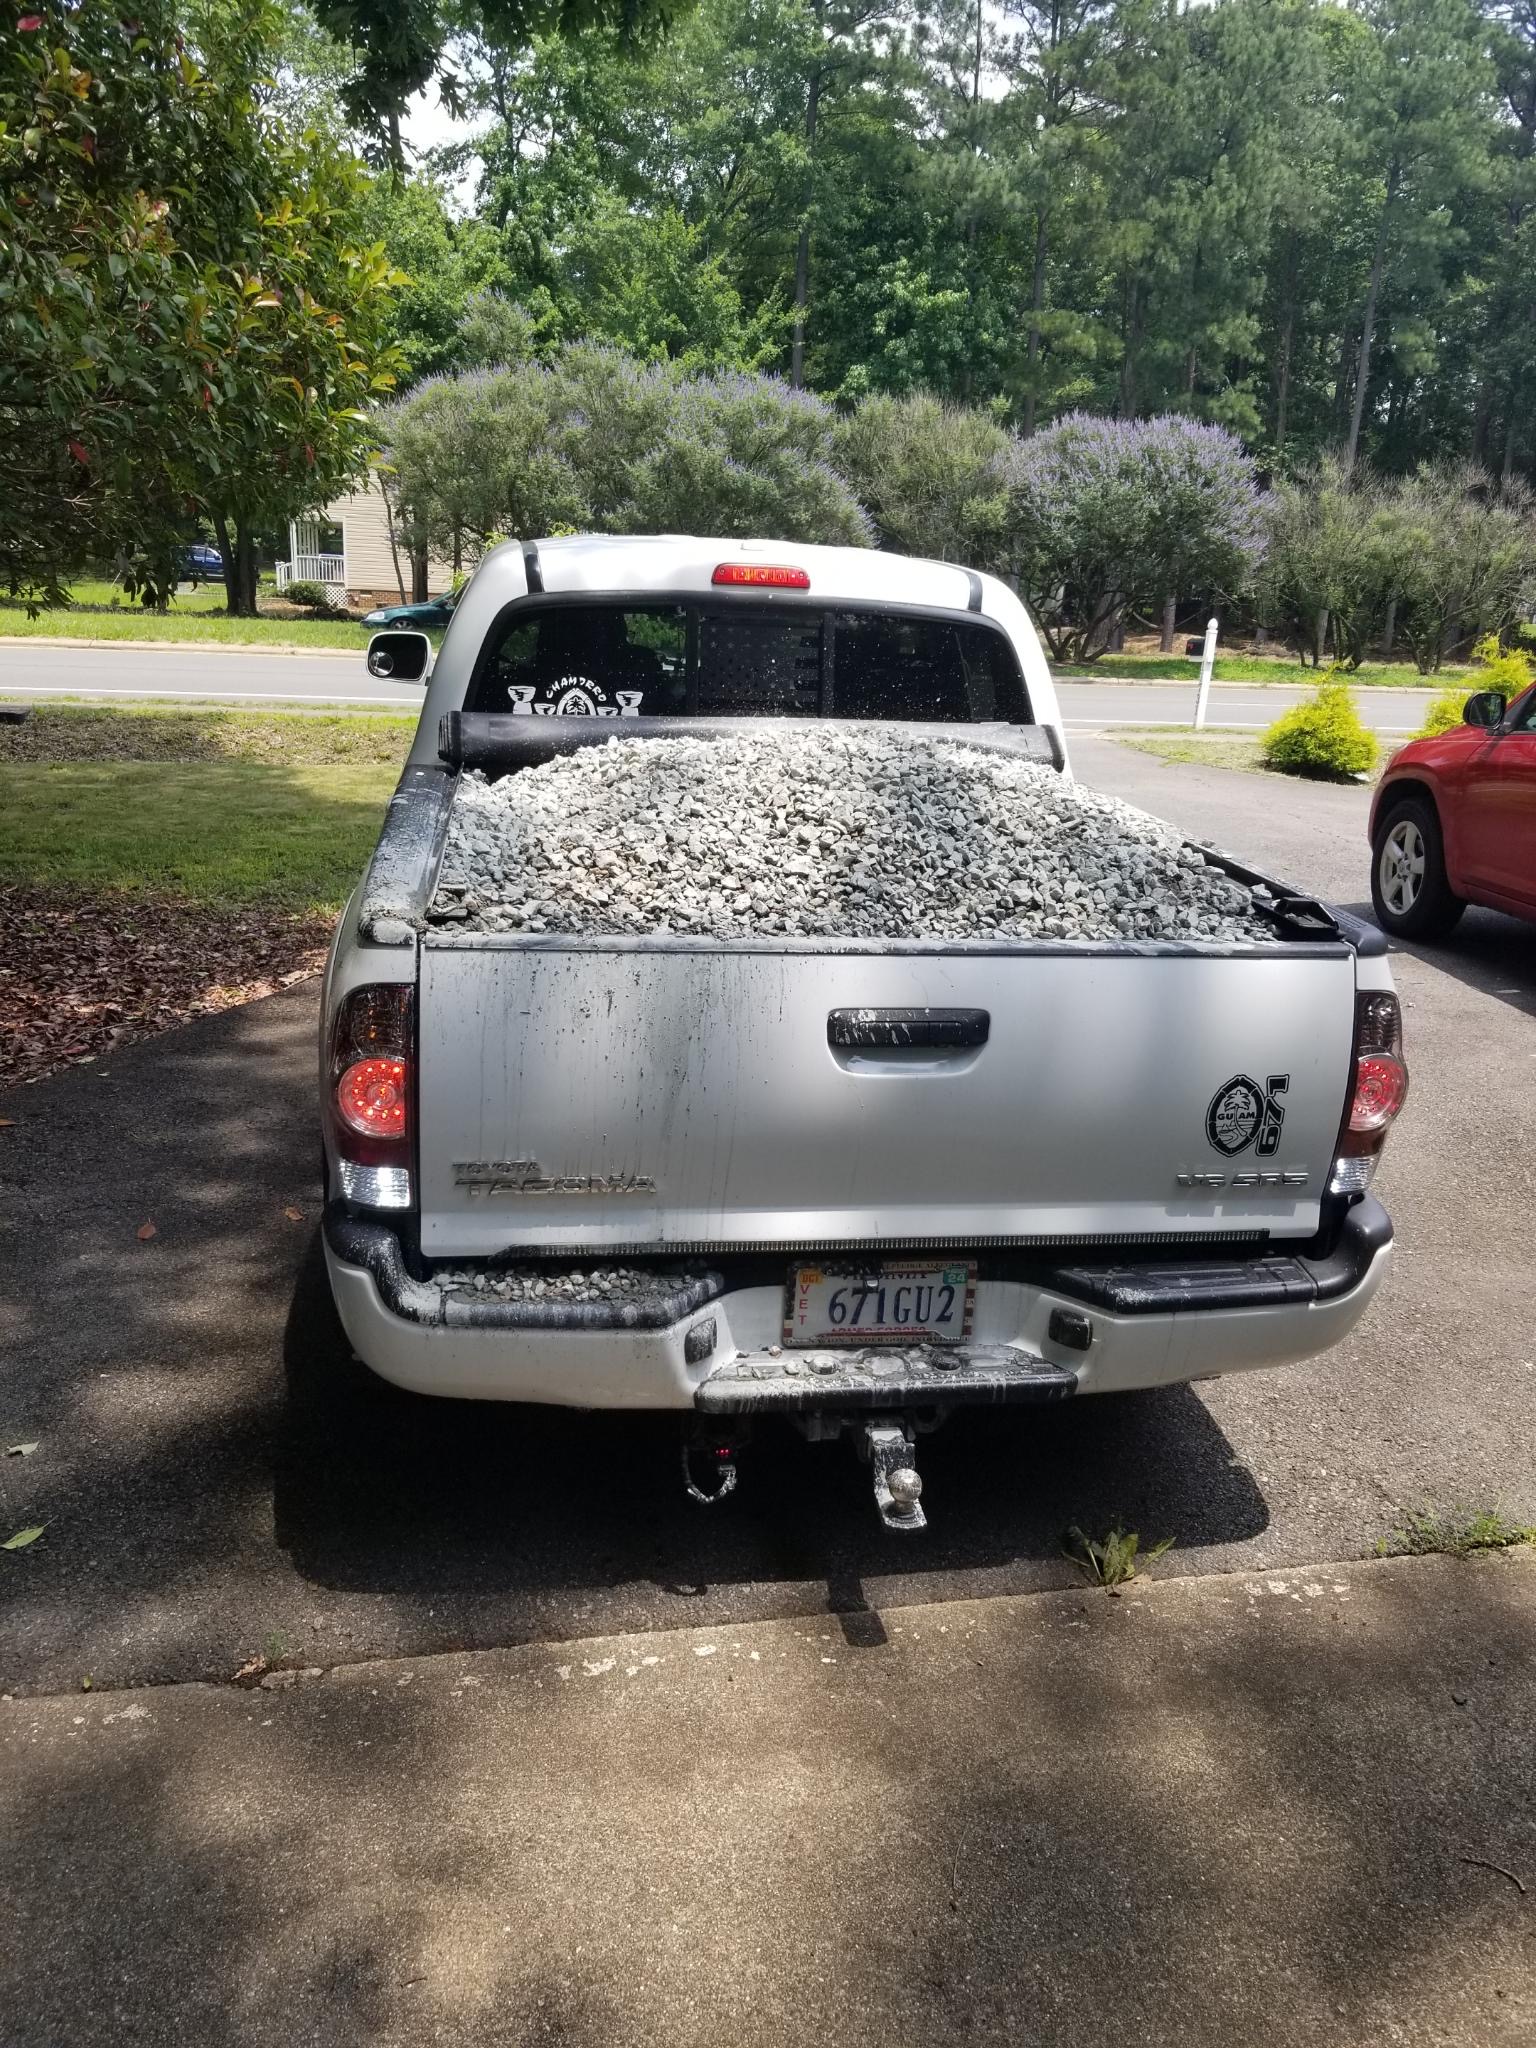
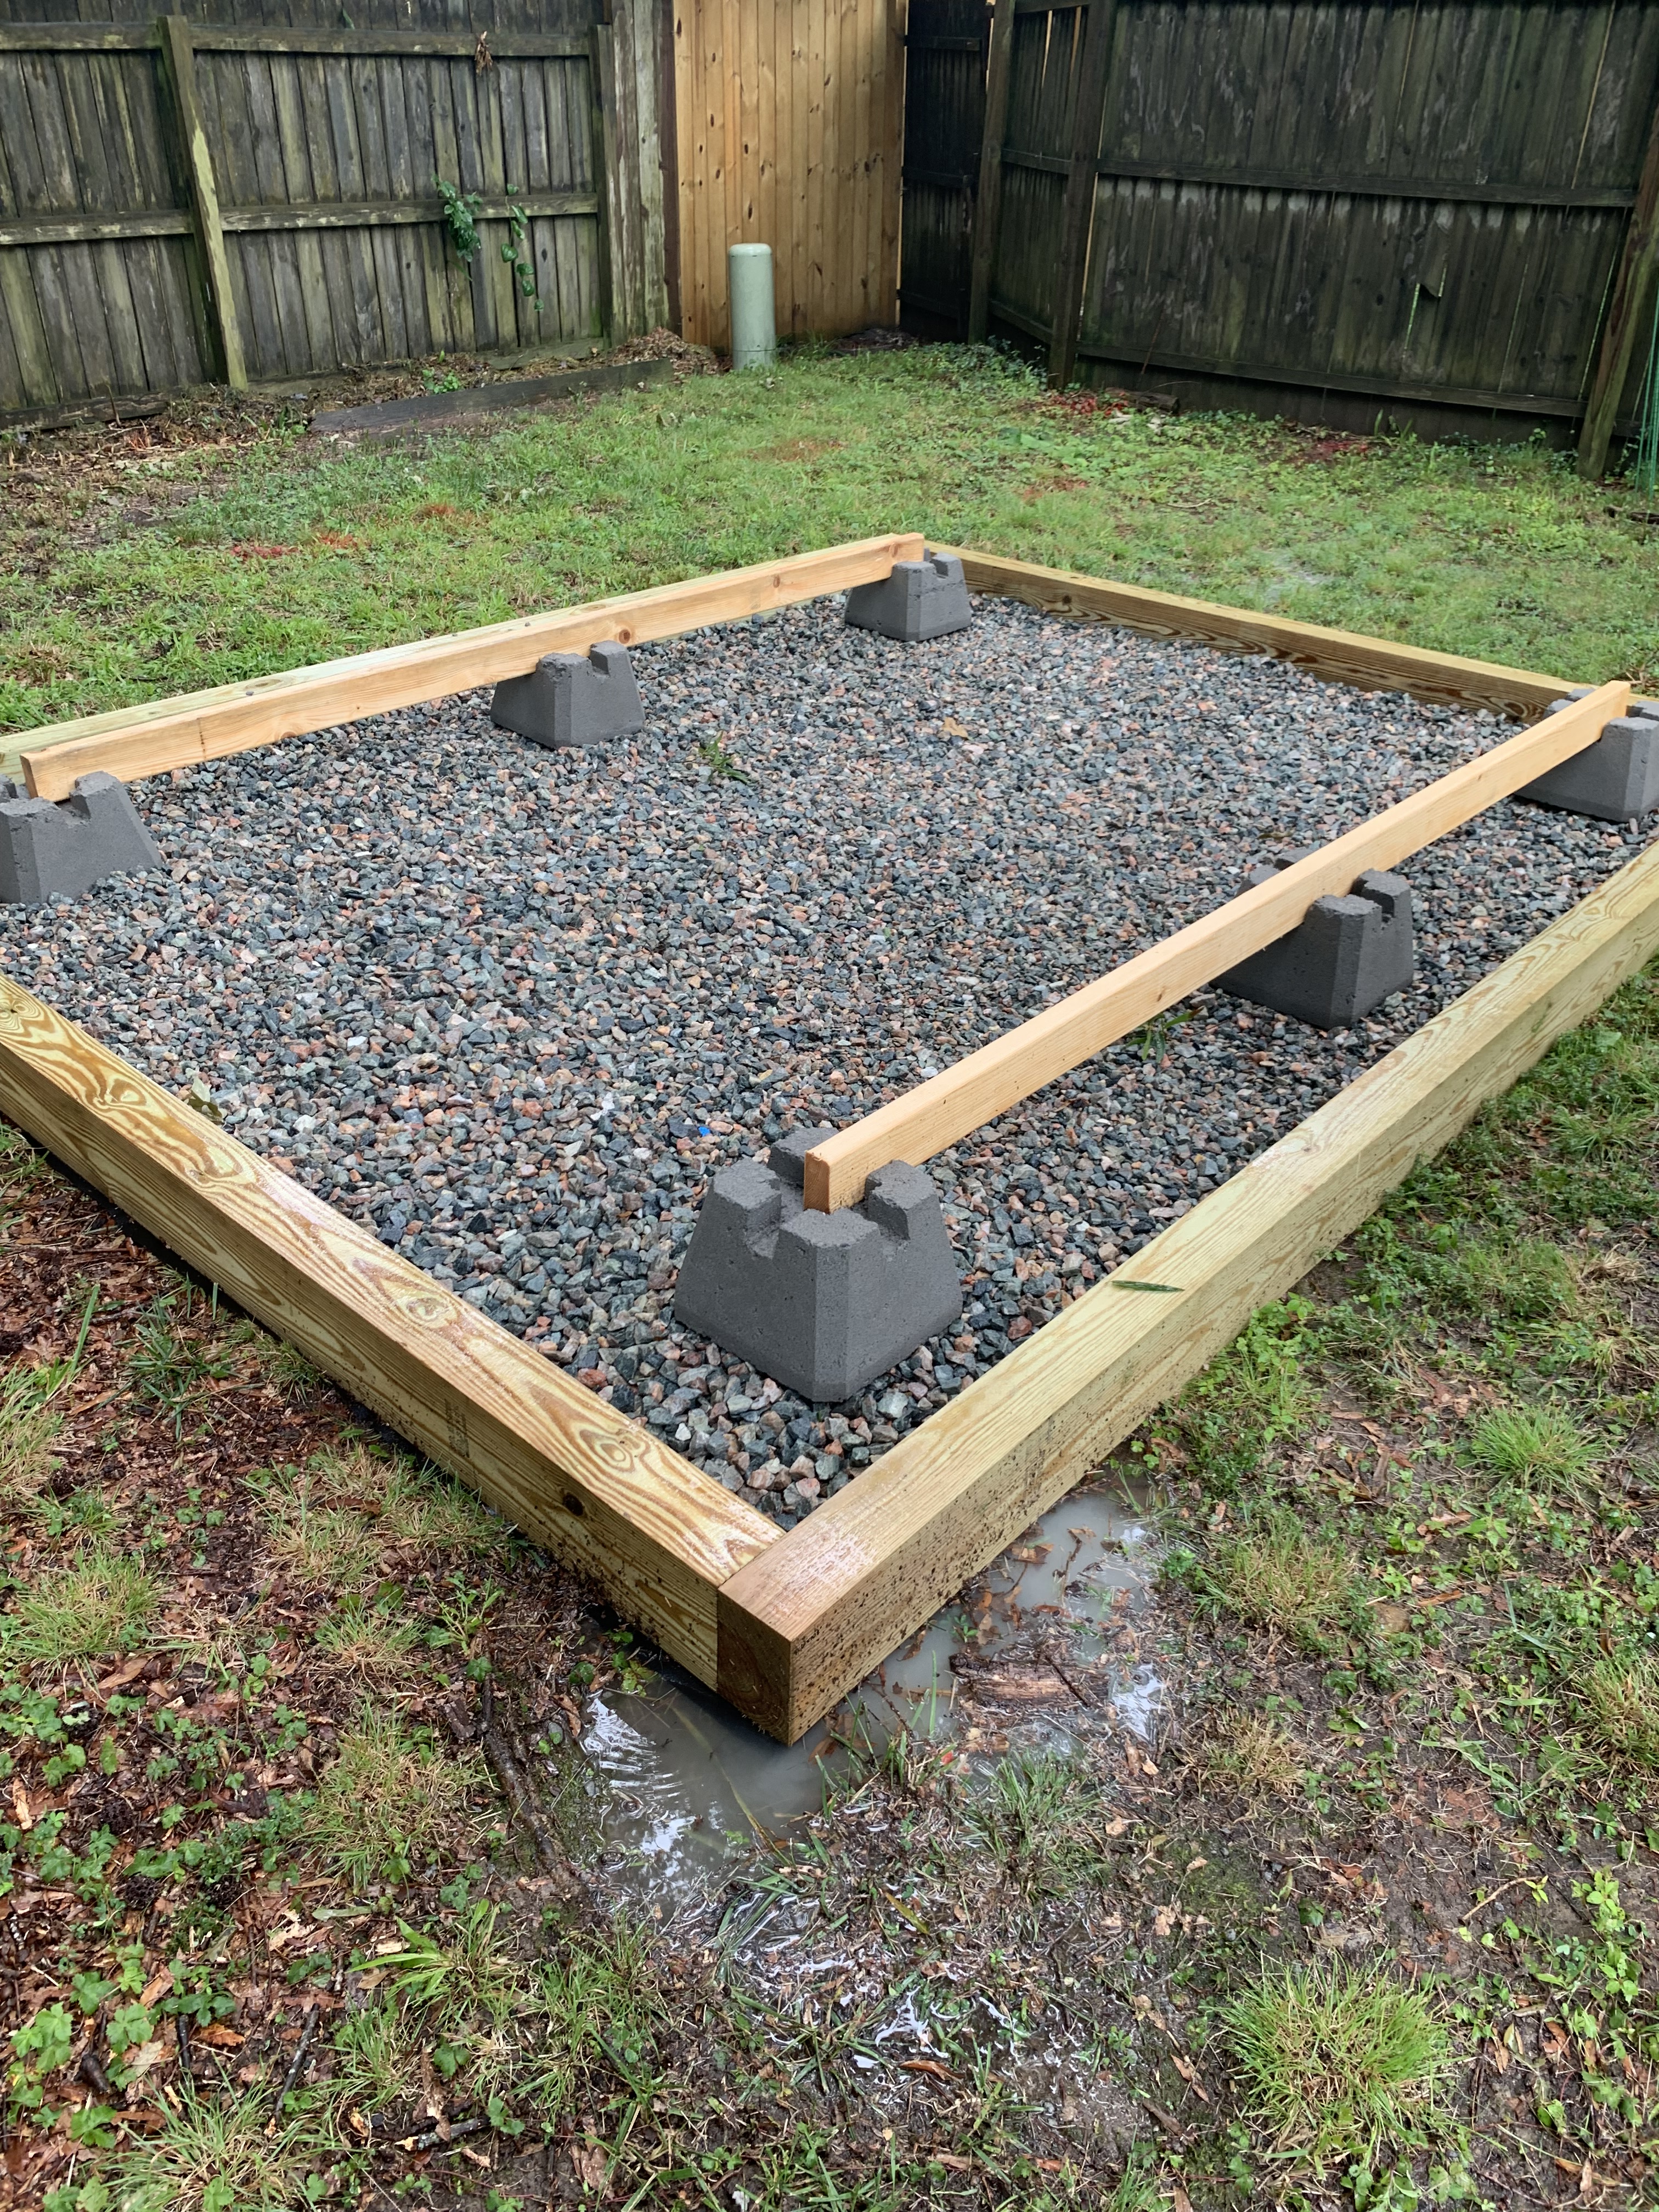
If you want to build a shed that you want to last, then you have to have a solid foundation. I went with a gravel foundation for my build. When having a foundation, you want to have a clearance of 1 foot on each side. So for my 6×8 shed build, I built an 8×10 gravel foundation. Also because of this being outdoors, you want to have treated wood against all surface that contact the ground or are expected to be exposed to water. Given that Richmond can be wet and also have significant humidity, I opted for pressure-treated for all wooden surfaces.
Foundation Base Supplies:
2 – 4″x6″x128″ Pressure Treated Lumber
2 – 4″x6″x96″ Pressure Treated Lumber
1.57 cu yd – #57 Crushed Gravel Stone
50 ft roll – Vevor 3oz Landscaping Weed Barrier
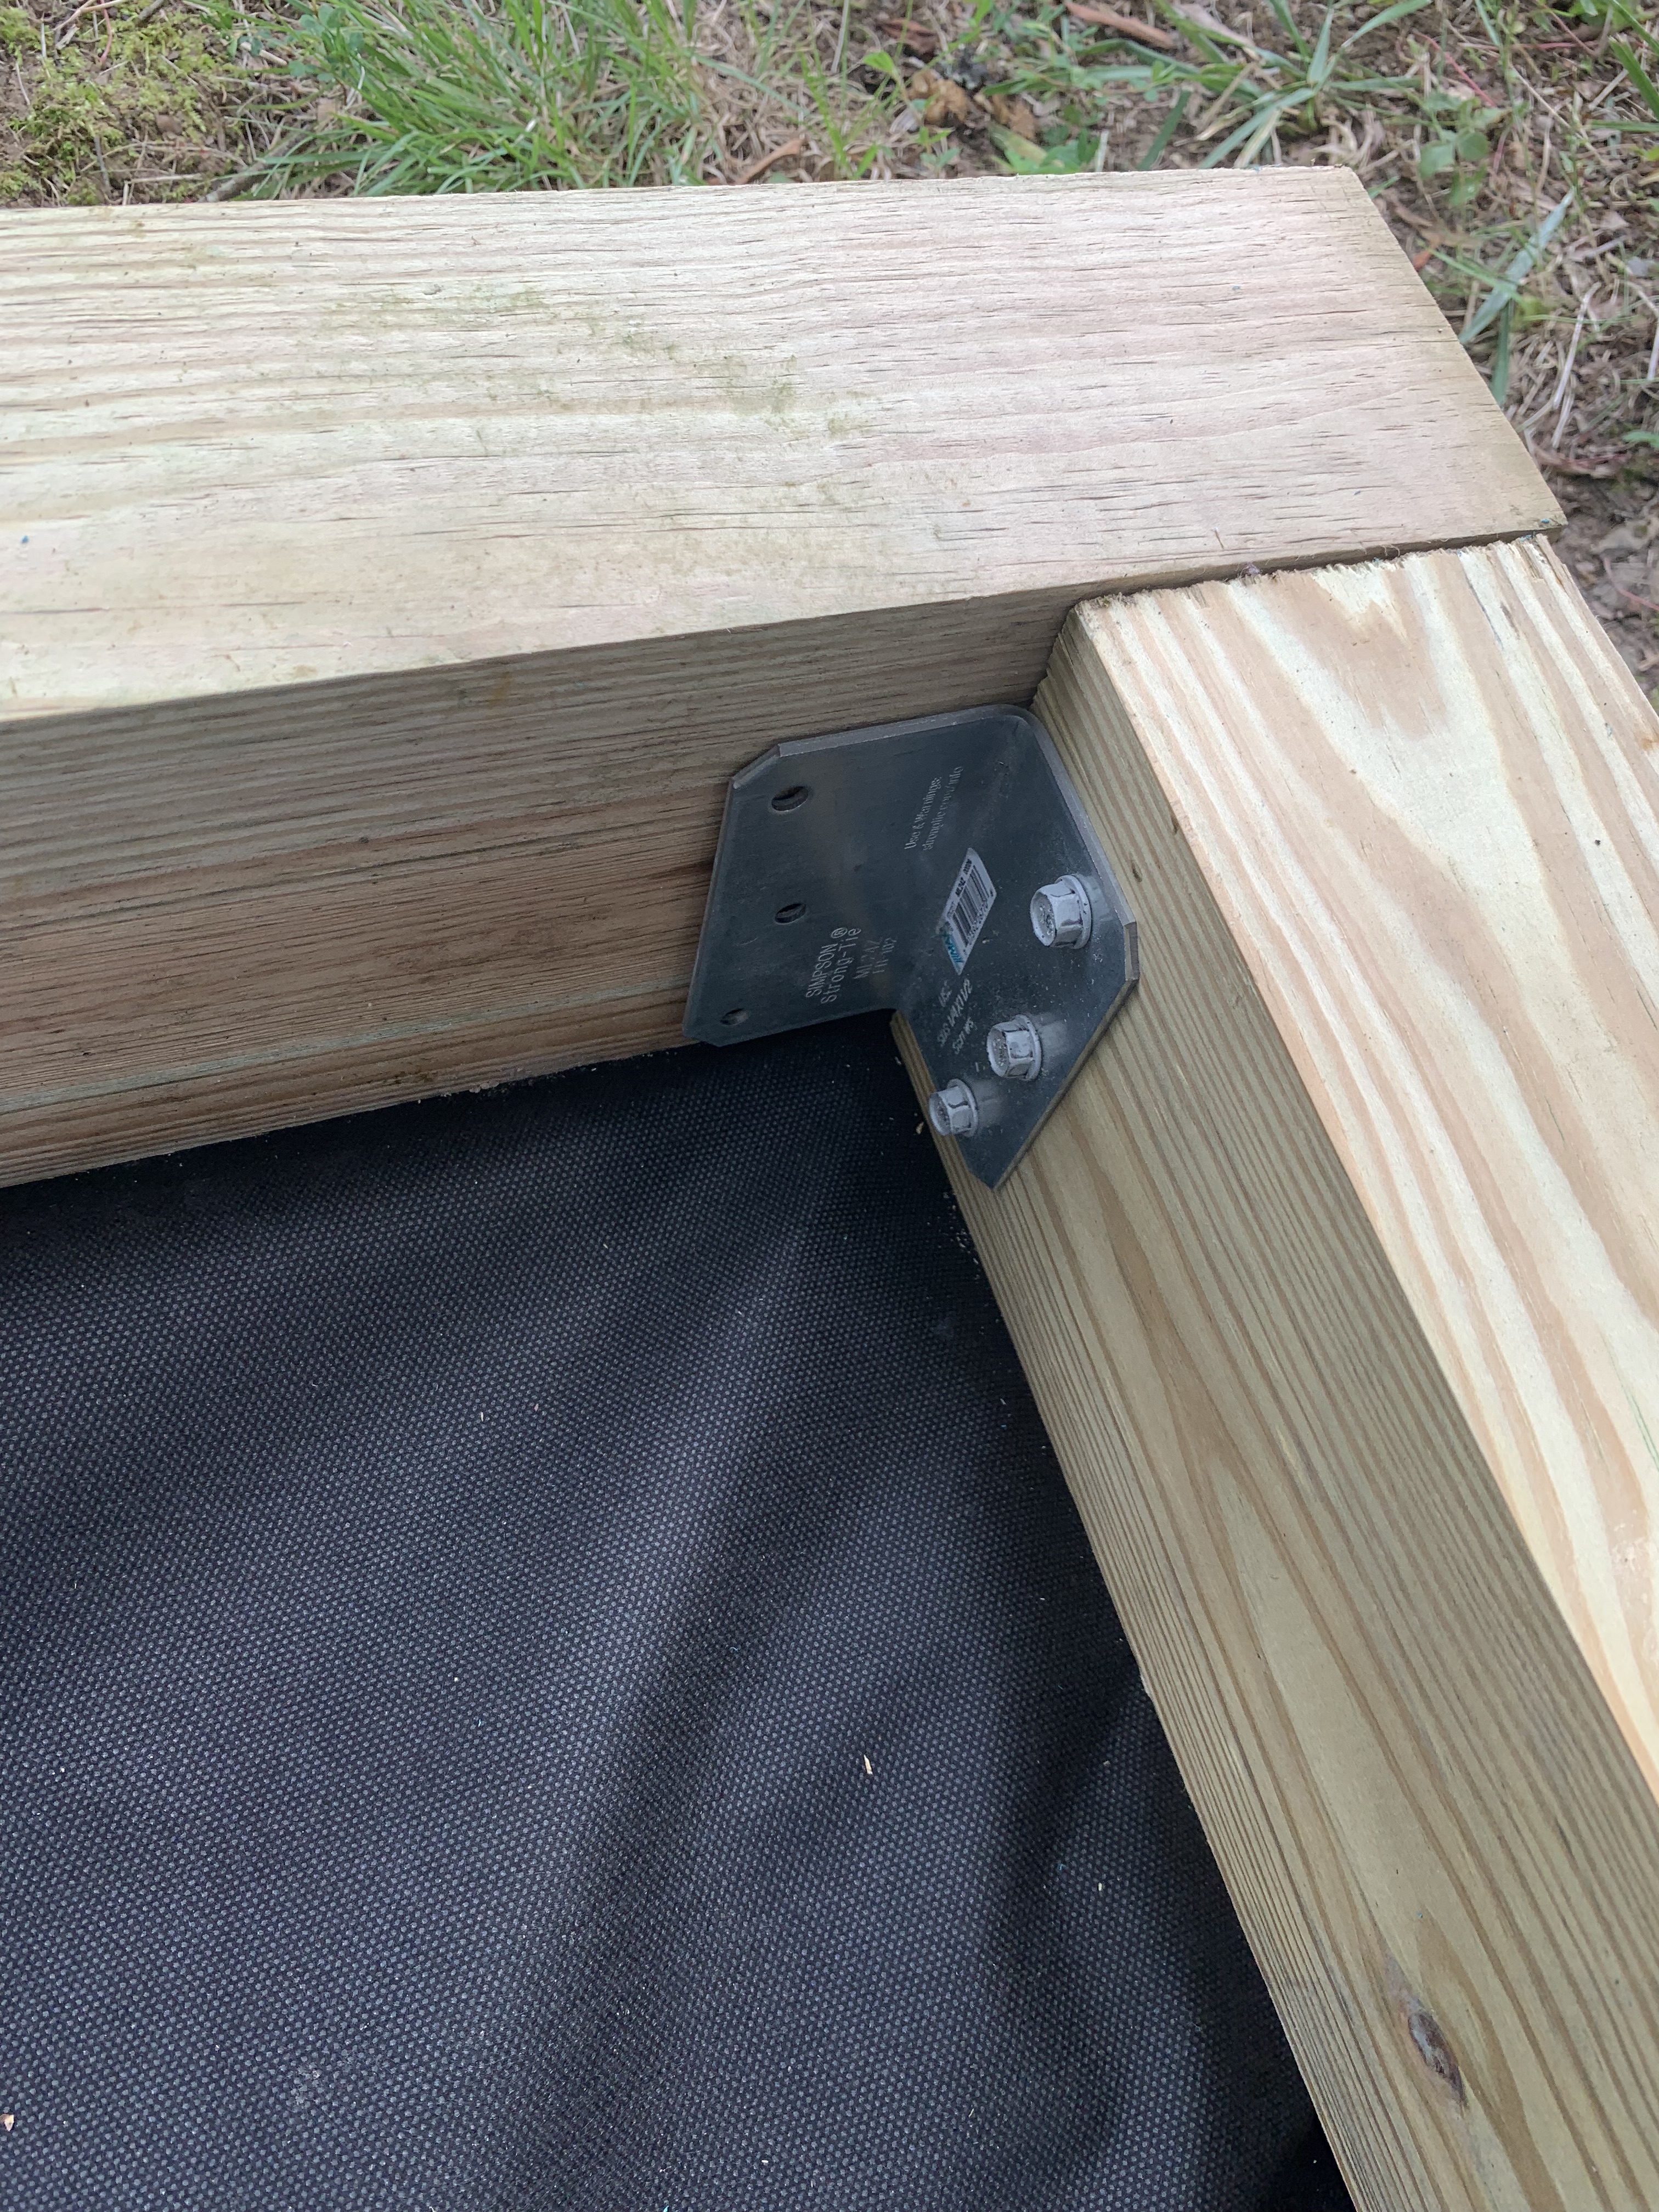
4 – 2″x2″x4″ 12 gauge Galvanized Steel Angle Bracket
Foundation Supplies:
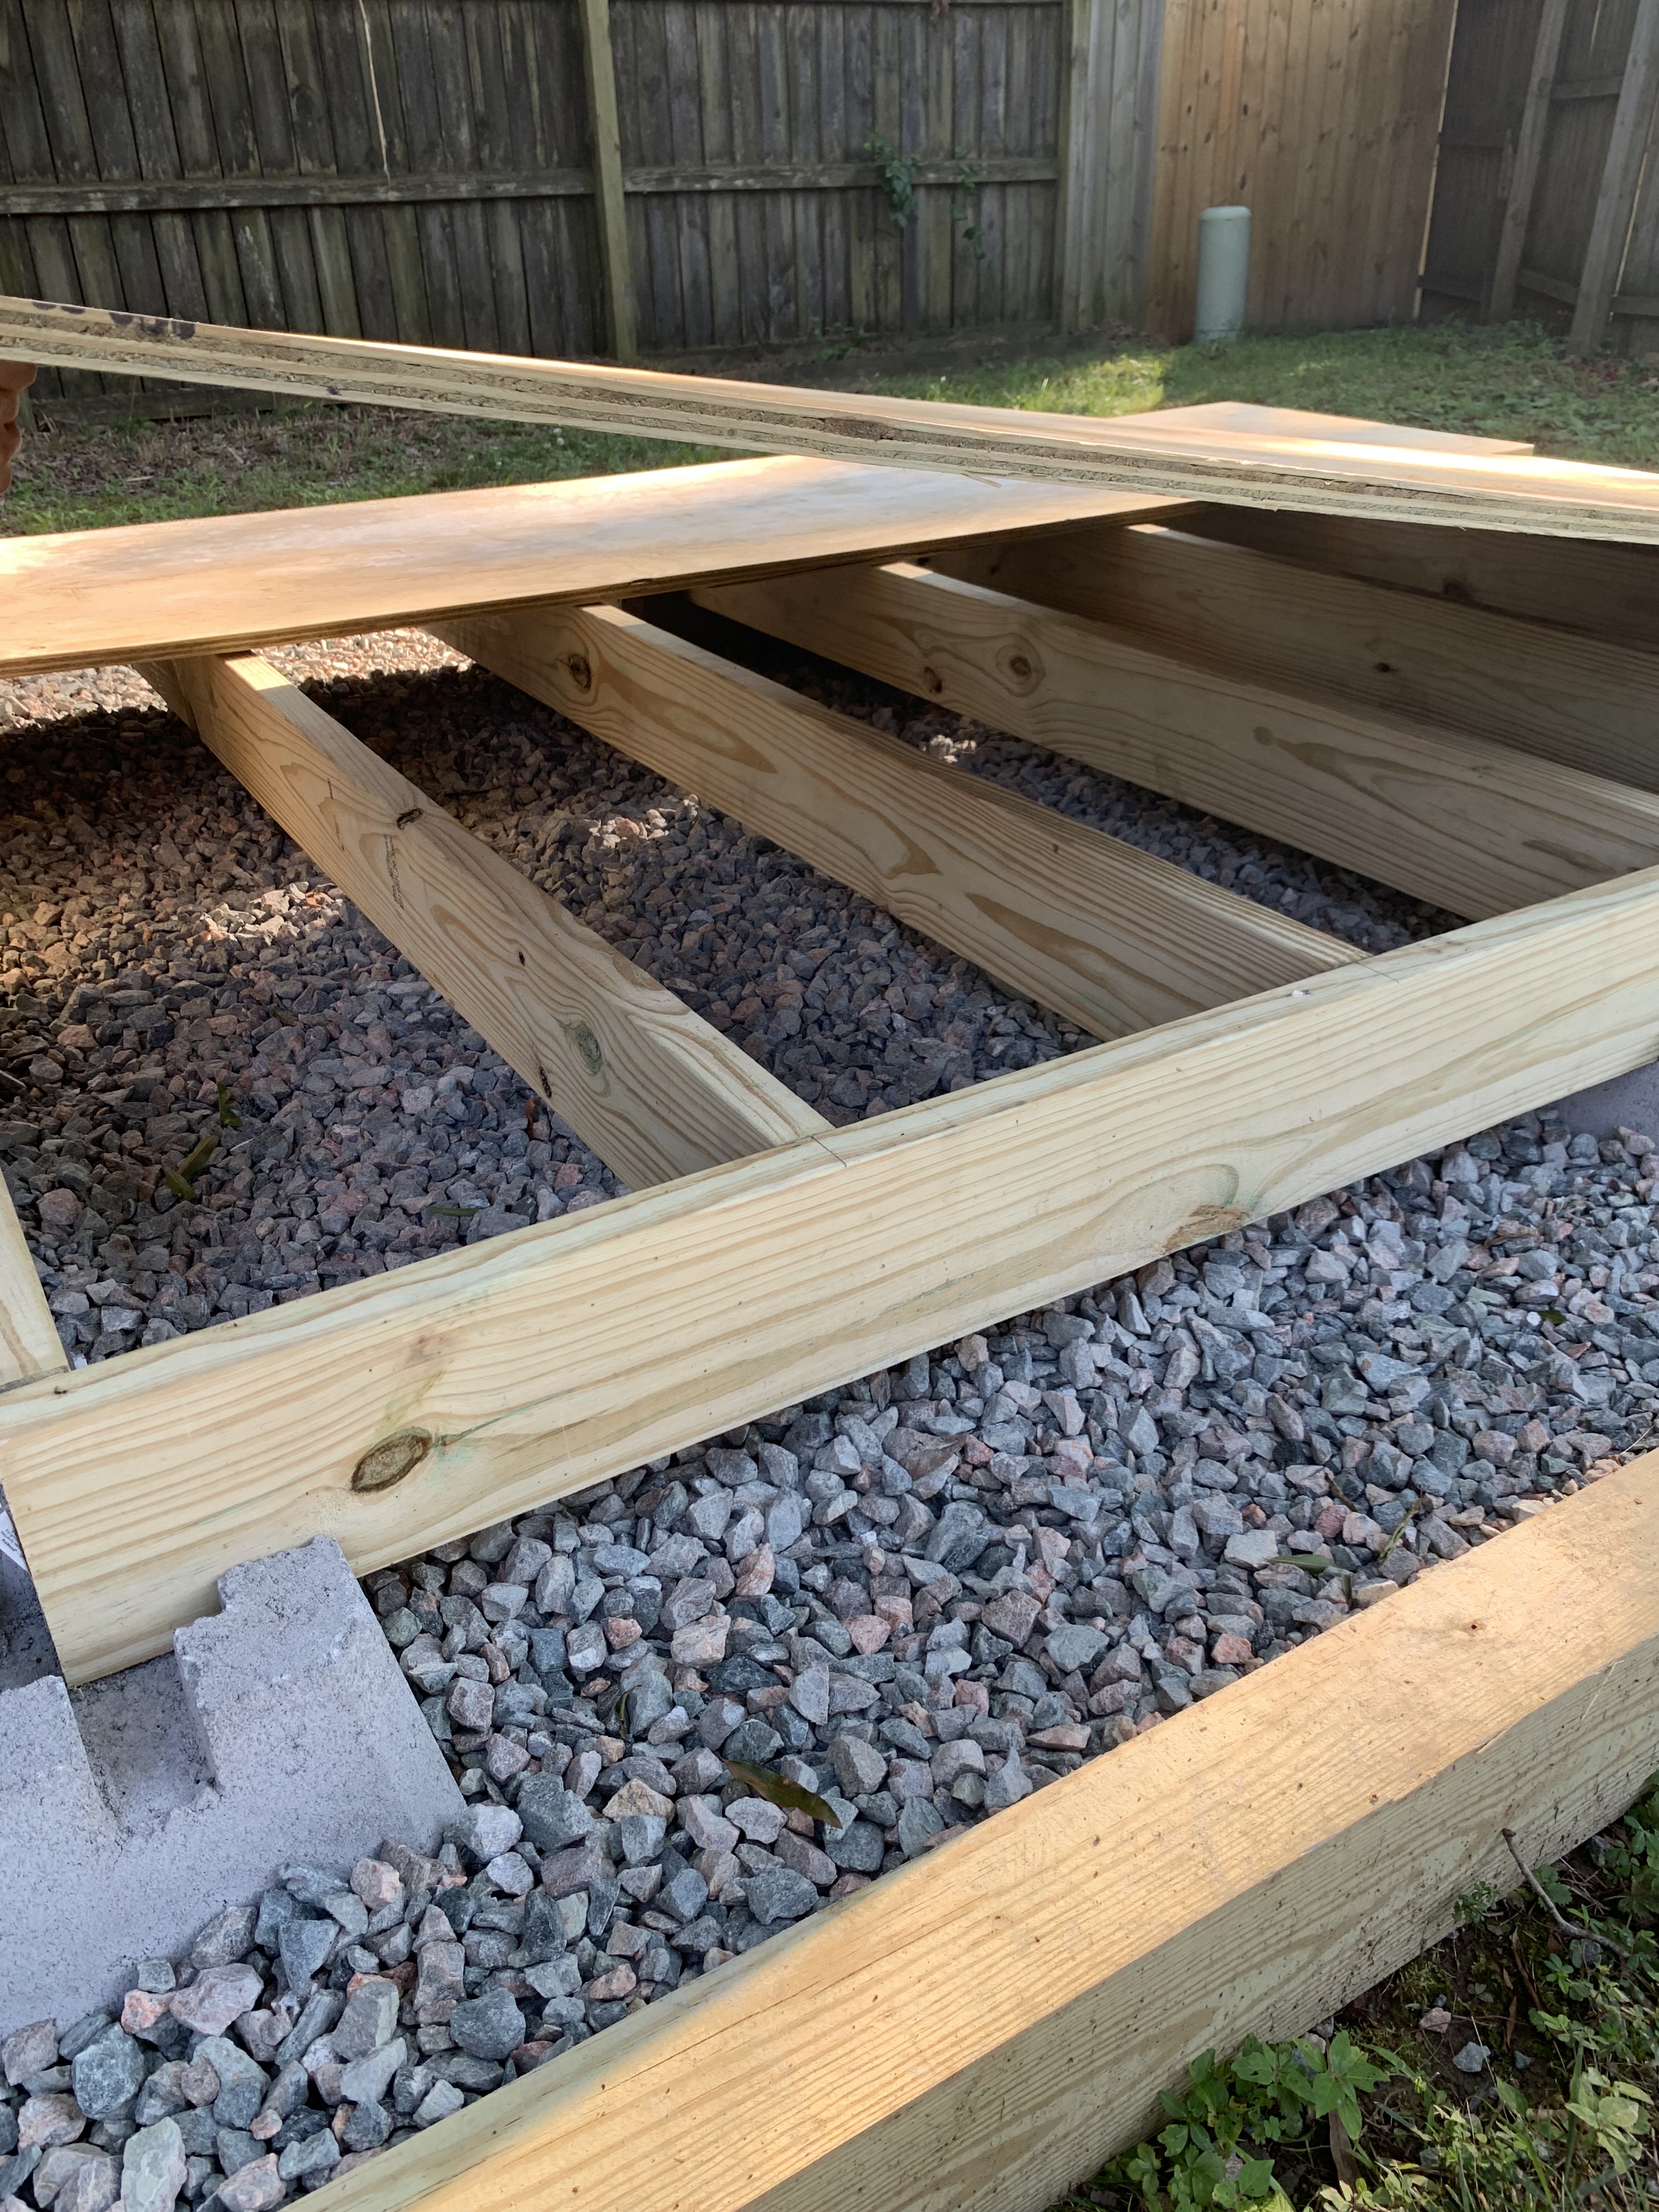
2 – 2″x6″x100″ – Pressure Treated Lumber
8 – 2″x6″x72″ – Pressure Treated Lumber
6 – Deck Concrete Blocks
10 – 2″x6″ 18 gauge Zmax Face Mount Joist Hangers
2 – 4’x8’x3/4″ Pressure Treated Plywood
All fasteners were exterior grade screws
In sequence:
- Prepare the surface you plan on building the shed using yardstakes with string tied to the ends to create rough dimensions. In my case an 8’x10′ interior required 8″ additional on each side to fit in the 4×6 pressure treated lumber
- Level the ground with shovel/hoe, dig approx 2″ to create a level ground
- After the surface is leveled, install the landscaping fabric
- Place the 4×6 lumber and ensure level
- Attach the lumber using angle brackets once level
- Lay down the gravel. To ensure weed suppression and adequate drainage, the gravel layer should be approx 3-4″
- Before tamping down or leveling the gravel, create small areas for where the deck blocks will be placed to create a strong anchor to the surface
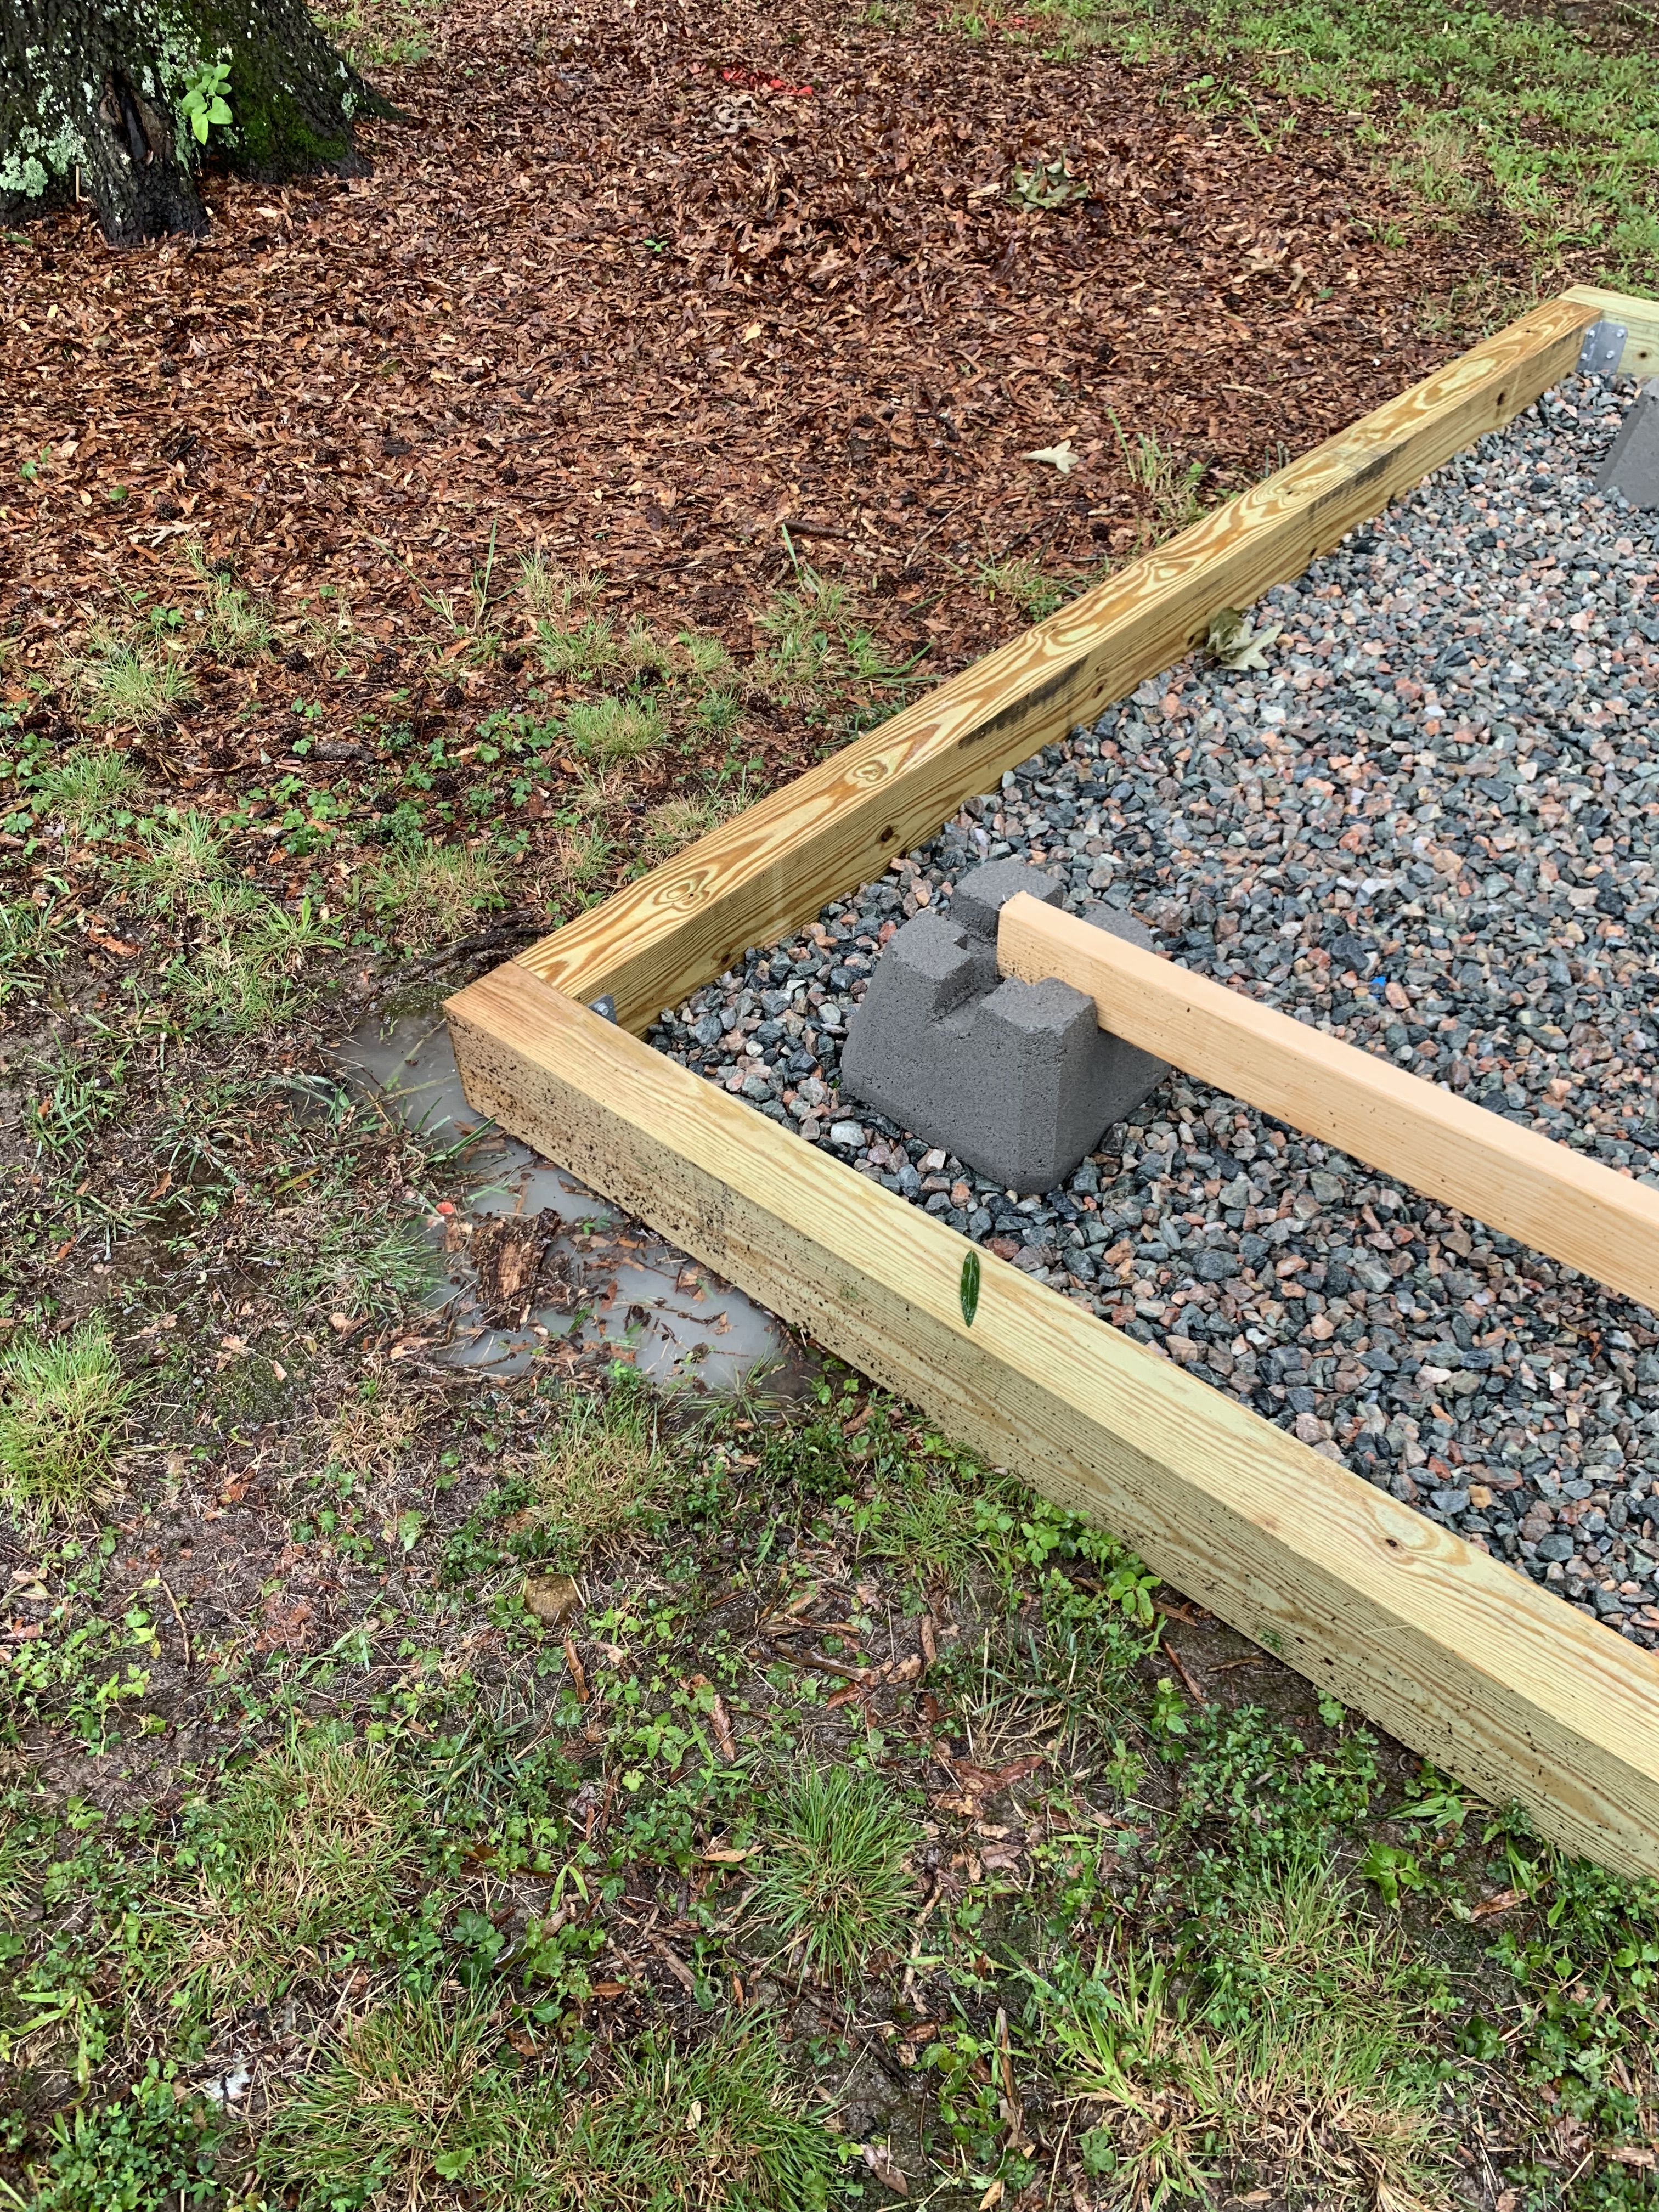

- Roughly place all deck blocks in these indented areas
- Place the outer frame together on top of these deck blocks, but don’t fasten them yet
- Use a level to ensure level frame and foundation. If not level, adjust either the gravel layer or position of the block
- Once the exterior frame is in place, use a tape measure to double check for square
- Retake level measurements and adjust as needed
- Build a gravel base around the deck blocks to ensure minimal movement
- Fasten the frame together
- Attach joists – In my case, I spaced each joist approx 14″ apart from each other and used joist hangers
- Fasten frame and joists together
- Cut and lay 3/4″ pressure treated plywood
- Fasten 3/4″ plywood to frame
- Foundation Complete!
Step 2: Build the Shed
Well, since this is a prefab shed, there really is no suspense. Follow the instructions to complete. I’m thinking that in the future, I may build an 8×10 shed in this foundation frame if I need more space.